Archive | Cooking & Baking RSS feed for this section

Pippa Middleton Eats Cake. This Cake.

16 Apr

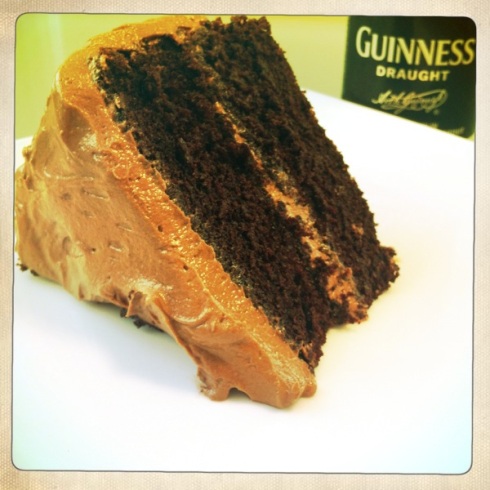
chocolate Guinness cake

I keep coming accross different representations of the same quote on Pinterest: “If you want to know where your heart is, look where your mind goes when it wanders.” If true, my heart might be in entertaining because my new medium of procrastination is tweaking recipes and hosting gatherings where I can have others help me ingest all the goodies I’m making!

On Sunday night, I had some friends over for dinner and as an entertainer extraordinaire I had to ensure my friends had something homemade for dessert. What’s dinner without dessert anyway? This is what I told myself, but really I had been longing to make chocolate cake and needed some help eating it. Just kidding. Ok, maybe I’m being a little bit honest here.

It was a delicious dinner and a great start to a week that I have promised myself not to include much deviation from my productive schedule. Of course, every good dinner comes with even better conversations.

Between bites of cake, one of my friends says: “Have you heard about this lady that spent $10k in plastic surgery to get Pippa Middleton’s butt?” Well, yes. “This cake is delicious by the way. 10 points for you and Pippa’s butt.”

Ever since the Royal Wedding, Pippa Middleton’s behind has had a great following worldwide. Plastic surgeons are banking on the Pippa buttlift, personal trainers are helping women break a sweat with the Pippa Middleton boot-y camp and a group of highly regarded intellectuals with a specialty in aesthetics have founded the Pippa Middleton Ass Appreciation Society on Facebook.

I guess no one has broken the news yet that the secret to Pippa’s sought-after bottom is actually in the Guinness chocolate cake I made this weekend. Ok, so this might not be exactly true but I am sure that as an English gal Pippa does enjoy a proper pint of stout. And well it’s safe to say that very few ladies do not enjoy a good serving of chocolate.

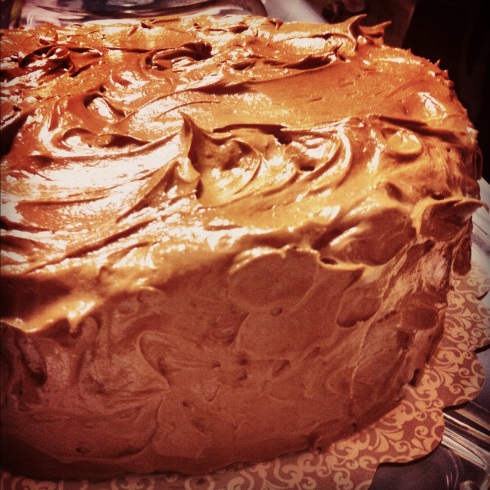
I have tried a few chocolate cake recipes and I must tell you, this is probably the most deliciously light and moist chocolate cake I have ever baked. It is definitely worthy of the palates of today’s royals, socialites and commoners alike.  There’s a cup of Guinness in it that can be substituted for strongly brewed coffee, although I advise against it since the Guinness really brings out the chocolate flavor.  And well, why choose coffee over Guinness?

chocolate Guinness cake

Pippa’s Guinness Chocolate Cake (with Guinness-Chocolate Buttercream Frosting)

For the cake:

1 3/4 cups all purpose flour (plus about 2 teaspoons for dusting the cake pans)
1 cup granulated sugar
1 cup light brown sugar, packed
3/4 cup unsweetened cocoa powder
2 teaspoons baking soda
1 teaspoon baking powder
1 teaspoon kosher salt
1 cup buttermilk
1/2 cup canola oil
2 large eggs
1 teaspoon pure vanilla extract
1 cup Guinness

For the frosting:

8 ounces semisweet chocolate chips
2 sticks unsalted butter, at room temperature
1 teaspoon pure vanilla extract
1 cup + 2 tablespoons confectioner’s sugar, sifted
4 tablespoons Guinness

Butter two 9-inch round cake pans, line them with parchment paper and butter the paper. Dust the pans with about a teaspoon of flour for each pan and gently tap out any excess (there’s a good tutorial for doing this here). Preheat the oven to 350°.

Sift together the flour, sugars, cocoa powder, baking soda, baking powder and salt in the bowl of an electric mixer. Mix everything for about a minute at low speed using the paddle attachment. In a medium bowl, whisk the buttermilk with the oil, eggs and vanilla. Heat up the the Guinness in the microwave for about a minute. Slowly beat the buttermilk mixture into the dry ingredients until just incorporated, then slowly beat in the Guinness until fully incorporated.

Pour equal amounts of the batter into the prepared cake pans. Bake for 35 minutes (or until a toothpick inserted in the enter of each cake comes out clean). Allow the cakes to cool, in the pans, for about 30 minutes. Transfer the cakes to a cooling rack and allow to cool completely. Peel off the parchment paper and discard.

In the meantime, melt the chocolate chips using a double boiler or use a microwave-safe bowl and heat in the microwave in 30-second intervals. Stir the chocolate chips until completely melted, then allow to cool to room temperature.

Using the electric mixer, beat the butter at medium speed until fluffy and pale yellow. Add the vanilla and beat for about 1 minute, scraping the side of the bowl with a spatula. Slowly beat in the confectioner’s sugar at low speed, for about 1 minute. Add the Guinness to the melted chocolate and mix until well incorporated. Slowly beat this mixture into the butter until just combined.

Set a cake layer on a serving plate or cake tray, flat side down. Level the cake using a serrated knife. Evenly spread about one third of the frosting over the cake just until you reach the edge. Level the second cake and place on top of the frosted cake. Spread the remaining frosting over the top and cover the sides of the cake.

Enjoy responsibly and in moderation.
Deviled Eggs & The Rest is History

8 Apr

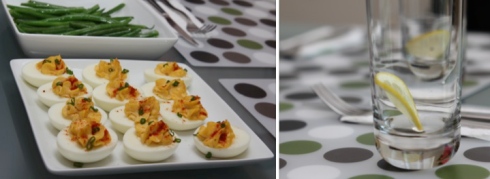
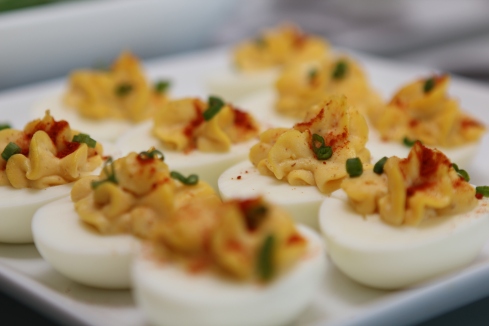
deviled eggs

My only memory of deviled eggs dates back to a soirée hosted by one of my most esteemed history professors in college prior to his return to London. It was quite a treat actually, having deviled eggs for the first time in the kitchen of the historian who authored Near a Thousand Tables: A History of Food, Felipe Fernández-Armesto. I experienced a bit of sensory overload that night compliments of the rich, mildly piquant deviled eggs and an engaging conversation with a very charming educator.  

I’ve wanted to make deviled eggs myself for a while and found Easter brunch to be the perfect opportunity for it. These make a rather elegant appetizer and can be made with ingredients usually found in one’s kitchen. I can tell you that after researching deviled eggs recipes online, I came up with my very own using what I had in my kitchen. No biggie.

I wonder what Prof. Fernández-Armesto has to say about the alleged Roman origins of deviled eggs and the variations of this dish across cultures.

A big Thank You to my brother for lending his photography skills for this blog post. He also made sure no deviled egg was left behind at the table.

deviled eggs 

Historic Deviled Eggs

6 large eggs
1/4 cup mayonnaise
1 tbsp organic german mustard
1/2 tsp Spanish sweet paprika
1/4 tsp Kosher salt
1/4 tsp fresh, crushed pepper
For garnish:  sweet paprika and green onions

Start by boiling the eggs until the yolks are hard. I recommend visiting Egg Watchers to use a fun and accurate timer for boiling perfect eggs. Once done, run your eggs under cold water, gently crack the shells and peel them. Allow the eggs to cool before cutting them lengthwise.

Carefully remove the egg yolks by using a small spoon, place them in a mixing bowl and arrange the egg whites in a serving platter. Using a fork, mash the egg yolks and add the remaining ingredients. Mix everything together using a whisk or a fork until all ingredients are well incorporated. For a creamier consistency, add more mayonnaise and adjust seasoning to taste.

Transfer the egg yolk filling to a pastry piping bag and fill the egg white “shells”. Garnish with sweet paprika and chopped green onions. Keep them refrigerated until ready to serve.

Welcome back, Betty

6 Apr

It’s been quite a while since I stepped foot into the kitchen to cook a real meal. For months, I’ve been surviving on canned tuna, whole wheat matzo crackers and apples with peanut butter (with the occasional orange beef and house special fried rice take-out meal from the Chinese restaurant right next to my office).

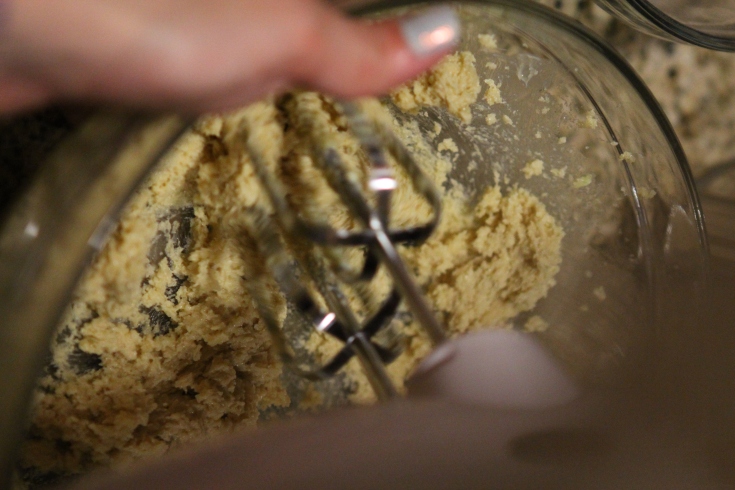
cookie dough and mixing bowl

Well, let’s say these days I have a bit more time to do what I love, including putting my kitchen utensils to work and writing.

I decided to cook a real dinner for a change and it came out beautifully. My sister, of course, wouldn’t let me off the hook that easy and communicated her craving for “something chocolatey”. Actually, it was more like “Hey, Betty Crocker, can you make me something for dessert?  With chocolate?”

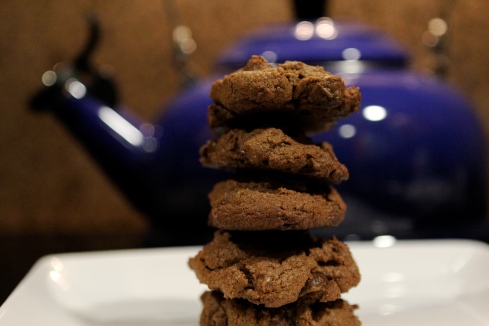
Diligently, I started researching quick alternatives to satisfy her craving and while going through my fridge and pantry I realized I had been hoarding  everything I needed to make chocolate chip cookies. Lucky her. I adapted a recipe from The Williams-Sonoma Baking Book and got to baking for the first time in months.

The cookies hit the spot for her craving. And, now I’m left with about a dozen cookies that keep calling me back into the kitchen for another bite (or two). I am convinced that if I enjoy them with a cup of green tea these won’t find shelter in my thighs.

I guess you’ll see me running like a madwoman around the neighborhood a lot more often.

double chocolate chip cookies
Double Chocolate Chip Cookies

Adapted from The Williams-Sonoma Baking Book (Chocolate Chip Cookies) 

1 1/3 cups white whole wheat flour
1/2 tsp baking powder
1/2 tsp baking soda
1/2 tsp kosher salt
1/4 cup unsweetened cocoa powder
1/2 cup (8 tbsp) unsalted butter
1/2 cup granualted sugar
1/2 cup light brown sugar
1 large egg
1/2 cup bittersweet chocolate chips
1/2 cup milk chocolate chips
Preheat oven to 350 F. Sift the flour, baking powder, baking soda, salt and cocoa powder.
In a large bowl, using an electric mixer in high speed, cream the butter until fluffy and pale yellow. Add the granulated sugar and brown sugar and continue beating until the mixture is no longer gritty when rubbed between your finger and thumb. Add the egg and vanilla and beat on low speed until blended, occasionally stopping the mixer and scraping down the sides of the bowl with a silicone spatula if needed.
Add the flour mixture to the butter mixture and mix on low speed or stir with a wooden spoon just until blended. Add the chocolate chips, mixing or stirring just until blended.
Using two spoons, shape the dough into 1-inch (2.5 cm) balls and place on the baking sheets, spacing the cookies about 2 inches (2cm) apart. Bake the cookies until golden brown, about 12 minutes.

Girl Scouts Samoas Cookies (Campfire Style) and A Burnt Finger

15 Sep

Like This!

I recently joined FoodBuzz.com and the first recipe that jumped at me was this Girl Scouts cookie recipe for Samoas by Batter Licker.

My favorite Girl Scouts cookie, that is. I remember being a Girl Scouts Brownie back in the day and buying most of the Samoas myself! I was a fat kid, high cholesterol and all, and my mother tried her best to keep me away from these cookies. Of course, going to college in Boston and having lovely Girl Scouts offer me Samoas at every T station I stepped foot in, didn’t help the kid inside me stay away from her favorite cookies when mom wasn’t looking either. Oh yeah, I looked forward to Girl Scouts cookie season every year and it made my T rides much more enjoyable.

Funny how I ended up romantically involved with a Samoan guy. Guess I have a thing for Samoans!

But I digress.

Of course, as soon as I found this recipe I knew I had to give it a try. I recruited my little sister as my sous-pastry chef and I switched my professional woman hat for my domestic baker bonnet. Because bakers wear bonnets in my world.

As you can see in the pictures, this is how Girl Scouts cookies would look if they were actually baked by Girl Scouts, at a campsite.

Look: very rustic indeed. It is hard to be precise after burning your finger with hot caramel. And, please don’t even think I was about to make piping bags out of parchment paper to make the perfect chocolate drizzles over the cookies at 11pm (and while trying to subdue the pain from by burnt finger)! All along I kept hearing my grandmother’s words in my head “Be extremely careful when handling hot caramel. It is the worst thing you can burn yourself with!”

Texture: Well, I feel obliged to be completely honest with you my readers and I must confess that I was not very impressed with the results of this recipe, or at least my version of it. The cookies lacked the chewy, coconutty, carameliness that characterizes my beloved Samoas. Instead, the caramel/coconut topping turned into a hard-to-bite topping.

I used store bought caramel chews instead of making my own caramel. Perhaps, I should’ve made my own?

Below is the recipe just in case you want to try it out yourselves and give me some suggestions on how to fix my Samoas signature topping. Until then, I think I will await the visit of an eager Girl Scout at my door.

We used different cookie cutters and made heart and star shaped cookies in addition to the traditional donut-shaped Samoas.

Girl Scout Cookies- Samoas
(Adapted from Batter Licker via Food Buzz.com)

Makes about 3 dozen

  • 3 cups grated coconut
  • 2 cups (16 oz.) soft, chewy caramel
  • 3/4 cups unsalted butter, melted
  • 1/2 cup brown sugar
  • 1 tsp. vanilla extract
  • 1/2 tsp. Kosher salt
  • 1 1/2 cup flour
  • 2 cups (16 oz) bittersweet chocolate, chopped or chips
  • Parchment paper

Preheat oven to 300F.

In a large bowl, mix melted butter, brown sugar (or white sugar and molasses), vanilla and salt until combined. Add flour, and mix until combined.

Lay one piece of parchment paper on kitchen counter. Transfer dough onto parchment paper. Place second piece of parchment paper over dough, and roll out dough with a rolling pin until it is 1/4-inch thick. Let stand while you toast the coconut flakes.

Spread coconut flakes evenly across a baking pan. Toast in oven for 10 to 15 minutes until golden brown, stirring every 5 minutes. Once coconut flakes are lightly browned, remove from oven, transfer to a large bowl, and allow to cool, stirring periodically (coconut will continue to toast slightly). Set aside, but keep oven heated at 300F.

Using a 1 1/2-inch round cookie cutter, stamp the dough. Using a 1/2 or 1/4-inch cookie cutter (or the wider end of a pastry tip, in my case), cut center holes out of each cookie. Transfer cut mini doughnut-shaped cookies to parchment or silicon-lined baking sheet. Roll out any remaining dough, and cut additional cookies, transfer to baking sheet, and repeat until all dough is used.

Bake on center rack in oven for 14 to 16 minutes until cookie edges turn lightly golden. Remove from oven, cool on pan for 5 minutes, then transfer to rack to continue cooling.

If using homemade caramel, make according to the instructions here, removing caramel from heat once it reaches 246F and immediately pouring it into a cool bowl (ignore all the subsequent cooling and rolling/cutting instructions). If using store-bought soft caramel chews, heat in microwave in 30 second increments, stirring between zapping sessions, until caramel becomes soft and melty.

Pour toasted coconut flakes into a bowl with the caramel and mix until evenly combined.

Using a spatula or your fingers, cover each cookie with the coconut caramel topping, pressing it onto the cookie to adhere. Allow topping to set.

Heat chopped chocolate in the microwave, stirring in 30 second increments, just until barely melted. Dip the bottom of each cookie into the melted chocolate, and set on wax paper to cool. Drizzle the top with chocolate  with a piping bag or spoon if desired. Store on wax paper in an airtight, refrigerated container for 3 to 5 days, if you can manage that sort of self-control. Allow to come to room temperature (unless room temp is 75F or warmer because chocolate will get too soft) before serving so the caramel softens up a bit.

Add to FacebookAdd to DiggAdd to Del.icio.usAdd to StumbleuponAdd to RedditAdd to BlinklistAdd to TwitterAdd to TechnoratiAdd to Yahoo BuzzAdd to Newsvine

Julia’s Boeuf Bourguinon

13 Sep

Like This!

Who doesn’t know Julia Child?

Julia Child and Meryl Streep as Julia Child (Image from MyWoddenSpoon.com)

Well, I have to admit my admiration for Julia came as a result of my obsession for Meryl Streep. I didn’t grow up in the United States, nor did I grow up in a household that experimented with interesting cuisines other than Latin America/Caribbean ones. I grew up surrounded by recipes and talk about who I have come to identify as Puerto Rico’s Julia Child– Carmen Valdejuli, in terms of their meaning to household cooks in their country, that is. I have a hard time picturing Valdejuli putting pieces of omelette back into a pan after spilling some on the counter.

Therefore, it wasn’t until the movie Julie & Julia was released that I became acquainted with the vibrant and amazingly likable American chef, Julia Child.

It has been about a year since I watched the movie and after rummaging online for Julia’s famous Boeuf Bourguinon recipe — yes, I still haven’t gotten her masterpiece Mastering the Art of French Cooking. Hint, hint: perhaps someone has a used copy they don’t want anymore?and a trip to Marshall’s where we finally found an “affordable” Le Creuset dutch oven, I was able to enjoy one of Julia’s most cooked recipes.

Let me just add that this wasn’t my first attempt at making Boeuf Bourguinon. I remember trying to make this dish a few years back when I was still a student in college. I was back home on break from school and wanted to cook a special dinner for my family.

Well, it didn’t go that well. I didn’t have a dutch oven, nor did I know what this was so, I used a turkey roasting pan instead. Bad idea. Lesson: don’t try this recipe unless you can get your hands on a dutch oven, even if it’s just for about 4 hours.

Yes, besides the dutch oven you will need about 4 hours total for this dish. If you’re like me and come home famished after work, it is better to cook the dish the night before actually having it for dinner. It takes only 10 minutes to reheat it on the stove and about 30 to boil the potatoes– if you decide on them as a side dish. You can also serve this dish with rice, mashed potatoes, pasta or just bread.

You can find Julia Child’s Boeuf Bourguinon recipe here, courtesy of Random House, Inc./ Knopf.

Julia Child's Boeuf Bourguinon

I boiled some potatoes, peeled them and then drizzled them with olive oil and sprinkled Kosher salt, pepper and chopped parsley on them. Even though we already had carbs on the plate, I added a small egg bread roll.

Of course, we had to have wine with this dinner. Same wine I used for cooking. 🙂

My Julia Child Boeuf Bourguinon was delicious! It was worth the wait and perfect for entertaining in the future.

Note: I received notice of the demise of my Le Creuset dutch oven shortly after writing this post. 😦

I can only hope to be one of the lucky winners of The Pioneer Woman’s giveaway of three Le Creuset 7 1/2-Quart Round French Ovens in “Caribbean” color.

Add to FacebookAdd to DiggAdd to Del.icio.usAdd to StumbleuponAdd to RedditAdd to BlinklistAdd to TwitterAdd to TechnoratiAdd to Yahoo BuzzAdd to Newsvine

Homemade Mexican-ish Salsa

31 Aug

Like This!

It’s been a while since I last posted a recipe. To be honest this new job is keeping me pretty busy during the day and I barely have any energy or time to cook or write at night. (Lame)

A few weekends ago, I was going through my fridge and found a couple of things that needed to be used right away. I was also in need of some entertainment so of course, I turned to one of my favorite things: cooking.

I came up with a recipe for a Mexican salsa that is very similar to the one served at a great Mexican restaurant back home. We later had some friends over for drinks, so I served it in a martini glass alongside yellow and blue corn tortillas. Yum!

Mexican-ish Salsa

  • 2 ripe tomatoes, diced
  • 1/2 onion, diced
  • 1 serrano pepper
  • 2 cloves garlic
  • 1/2 teaspoon Kosher salt
  • 2 teaspoons white vinegar
  • 1 teaspoon olive oil

Roast the serrano pepper until skin becomes black. You can use the broiler for this step. Peel skin off, remove stem and seeds and dice. Roast garlic cloves with skin on until they become sweet and soft. Carefully peel the garlic cloves and remove any overdone or burnt edges.

Pour all ingredients into food processor and pulse until well incorporated.

Refrigerate until ready to serve.

Isn’t it cool how the ingredients in this recipe have the same colors as the Mexican flag?

Add to FacebookAdd to DiggAdd to Del.icio.usAdd to StumbleuponAdd to RedditAdd to BlinklistAdd to TwitterAdd to TechnoratiAdd to Yahoo BuzzAdd to Newsvine

My First Time – Soufflé

16 Aug

Like This!

As some of you know, I am currently attending culinary school. And of course, by attending culinary school I mean that I have the Food Network on most of the day.

I can’t complain. I have learned valuable cooking techniques from some of the nation’s favorite chefs and have tested delicious recipes in the comfort of my own home.

A coupe of weeks ago, during the “Barefoot Contessa Back to Basics” course dedicated to High Wire Eggs Dishes, Ina (we’re on a first name basis now) taught us how to make a Spinach and Cheddar Soufflé. She promised her technique would yield the perfect soufflé every time, and I’m happy to say that her promises were not in vain.

Perhaps one of the most intimidating foods to make, soufflé takes precision and patience when it comes to both preparing and baking the dish.  I have to admit that I was so scared of not getting it right, I stood in front of the oven, looking through the window for about 30 minutes until my soufflé finally puffed and it was golden brown.

I didn’t have a big soufflé dish, so instead I used 3 medium-sized ramekins from Target. This worked out perfectly and made even, one-person soufflés. I think I prefer to do this rather than bake the whole thing in a big mold.

Another tip for this recipe is to place the grated parmesan cheese in the food processor and pulse until you are left with small bits similar to breadcrumbs. This makes it easier to coat the ramekins. And, always use fresh parmesan instead of that powdery stuff that comes in a bottle!

Spinach and Cheddar Soufflé

Adapted from Barefoot Contessa

  • 3 tablespoons unsalted butter, plus extra for greasing the dish
  • 1/4 cup finely grated Parmesan cheese, plus extra for sprinkling
  • 3 tablespoons all-purpose flour
  • 1 cup scalded milk
  • 1/4 teaspoon of nutmeg
  • Pinch of cayenne pepper
  • 1/2 teaspoon Kosher salt
  • 1/4 teaspoon freshly ground black pepper
  • 4 extra-large egg yolks, at room-temperature
  • 1/2 cup grated aged Cheddar cheese, lightly packed
  • 1 package frozen chopped spinach, defrosted and squeezed dry
  • 5 extra-large egg whites, at room temperature
  • 1/8 teaspoon cream of tartar

Preheat the oven to 400 degrees F.

Butter the inside of a 6 to 8-cup souffle dish (6 1/2 to 7 1/2 inches in diameter by 3 1/2 inches deep) and sprinkle evenly with Parmesan.

Melt the butter in a small saucepan over low heat. With a wooden spoon, stir in the flour and cook, stirring constantly, for 2 minutes. Off the heat, whisk in the hot milk, the nutmeg, cayenne,  salt and  pepper. Cook over low heat, whisking constantly, for 1 minute, until smooth and thick.

Off the heat, while still hot, whisk in the egg yolks, one at a time. Stir in the Cheddar, 1/4 cup of Parmesan and the spinach and transfer to a large mixing bowl.

Put the egg whites, cream of tartar, and a pinch of salt in the bowl of an electric mixer fitted with the whisk attachment. Beat on low speed for 1 minute, on medium speed for 1 minute, then finally on high speed until they form firm, glossy peaks.

Whisk one quarter of the egg whites into the cheese sauce to lighten and then fold in the rest. Pour into the souffle dish, then smooth the top. Draw a large circle on top with the spatula to help the souffle rise evenly, and place in the middle of the oven. Turn the temperature down to 375 degrees F. Bake for 30 to 35 minutes (don’t peek!) until puffed and brown. Serve immediately.

Add to FacebookAdd to DiggAdd to Del.icio.usAdd to StumbleuponAdd to RedditAdd to BlinklistAdd to TwitterAdd to TechnoratiAdd to Yahoo BuzzAdd to Newsvine

Confession: Baking Disaster #1

12 Aug

Like This!

No one’s perfect. Everyone fails at some point in their life. However, as the great philosopher Carrie Bradshaw once said, “When real people fall down in life, they get right back up and keep walking.”

In preparation for tomorrow’s viewing of the film Eat, Pray, Love I decided to make a batch of brownies to sneak into the movie theatre. Yes, I do occasionally bring my own snacks to the movies because as you all know there’s a recession and the theatre I go to does not have the sweets I like. No big deal. Besides, what’s a better companion to Eat, Pray, Love other than chocolate?

I am told by many that my brownies are really good. (I used to make them for my co-workers as a birthday gift and people would sneak into their offices to steal the brownies. So, I guess they are breach-of-privacy-and-theft-worthy good.) The secret: a “specific brand” of brownie mix and a couple of well… secret ingredients to jazz it up.

It turns out that I happened to have a semisweet chocolate bar from the same “specific brand” I love for my brownies in my pantry and on its label was a recipe for brownies from scratch. Of course, I thought this recipe was going to turn out even more amazing than the fool-proof mix.

I was wrong. Very wrong. I followed the instructions and measurements to the T. (Ok, I did add my special ingredients but they are not to blame for the disaster as they are only enhancers.)

I ended up with a batch of pale, grainy and sugary yet salty cakes that tasted nothing like chocolate and therefore, nothing like my brownies. When I tried them, it was like putting a spoonful of sugar in my mouth with a hint of sea salt.

To give you an idea of how off their color was, let me share with you my brother’s reaction. I was at pilates, working my butt off literally, and I get a text message from my brother asking: “Are these pot brownies?” Let me just say that he asked this, not because I bake pot brownies that look just like these, but because they looked liked nothing I’ve ever baked. He was puzzled.

I tasted the brownies multiple times, hoping that “at some bite” they’d get better. “Maybe something’s wrong with my taste buds today”, I thought. So, I asked my brother to asses them too and his verdict wasn’t that promising either.

I was heartbroken because I wouldn’t have brownies for my girlfriends tomorrow after I’d promised them (and because I had eaten at least four bites of non-pleasurable calories after my very painful, nausea-inducing workout). My brother, being the psychologist in training that he is, appropriately advised me to dump the brownies before I ended up eating the whole batch only to discover what I knew all along– it was a batch of brownies that didn’t work out.

“Sometimes, you just fail,” my brother said as he threw the brownies into the garbage disposal.

I have shared my baking failure publicly. I guess I now have to get right back up and keep on baking.

Add to FacebookAdd to DiggAdd to Del.icio.usAdd to StumbleuponAdd to RedditAdd to BlinklistAdd to TwitterAdd to TechnoratiAdd to Yahoo BuzzAdd to Newsvine

Quarterlife Crisis and Really Good Cupcakes

9 Aug

Like This!

This is a difficult post to write.

Last Thursday was my birthday. My 25th birthday.

I had heard and read about a phenomenon called “Quarterlife Crisis” a few years ago and I had this weird gut feeling I might experience it myself one day, perhaps because I was already experiencing it. A Quarterlife Crisis is defined as a period of anxiety and uncertainty in many twenty-something to thirty-something individuals. The problem: not knowing what we’re doing next in life.

And here I am today, living a life very different from the one I imagined I’d be living at 25 and self-diagnosing myself with the “Quaterlife Crisis” syndrome (?). Unemployed, itching for more education, hungry for more adventure, afraid of failure and yet not sure about what to do next I celebrated my 25th birthday.

Yet, despite everything I described above, I had an amazing birthday. I am lucky enough to have people in my life that love me enough so as to make me forget about everything that bugs me. On Thursday night, I enjoyed a delicious dinner at Naoe (review coming soon) with the boy and on Friday we had a Martini & Dumplings cocktail party hosted and organized by no one else but the boy.

Check out Notable Nibbles review of our Hendricks Gin Martinis that night — an absolute favorite of mine!

Of course, when I found out I was having a birthday party I knew I had to bake some cupcakes. There’s so many recipes I want to try and not enough reasons to make them all. I just can’t keep baking and eating everything myself. Perhaps, setting up  my very own cupcake stand in front of my apartment building will solve the problem.

And because it was my birthday, I decided to make Ghirardelli chocolate cupcakes with Baileys buttercream frosting– yet another baking success. Well,  except for the fact that the buttercream frosting melted on the way to the party because it was 101°F  that day thus, ruining my presentation.

Nonetheless, they were very yummy. Chocolate cake and Baileys shot all-in-one.

Ghirardelli Chocolate Cupcakes with Baileys Buttercream Frosting

Ghirardelli Chocolate Cupcakes
Makes 12 standard-size cupcakes

Recipe adapted from Ghirardelli website.

  • 1/2 cup Ghirardelli Unsweetened Cocoa Powder
  • 1 1/8 cup King Arthur White Whole Wheat Flour or  all-purpose flour
  • 1 1/4 teaspoon baking soda
  • 1/4 teaspoon salt
  • 1 large egg
  • 1/2 cup firmly packed light brown sugar
  • 1/2 cup granulated white sugar
  • 5/8 cup whole milk
  • 1/3 cup strong brewed coffee or espresso, room temperature
  • 1 teaspoon pure vanilla extract
  • 1/2 cup (or 1 stick) unsalted butter, melted

Preheat the oven to 350°F. Line a 12-cupcake pan with liners.

Sift together the flour, cocoa powder , baking soda and salt. In a medium bowl and using an electric mixer, blend the egg, brown sugar, and white sugar. Incorporate the milk, coffee, vanilla extract and melted butter. Add the dry ingredients in increments making sure the batter becomes a homogeneous mix of all the ingredients. Divide the batter evenly among the cupcake molds, filling them about three-quarters full with an ice cream scoop.

Bake for 15-20 minutes, or until a toothpick inserted in the middle of the cupcakes comes out clean. Cool for about 10 minutes and then carefully transfer to a wire rack.

Baileys Buttercream Frosting

  • 3 cups confectioner’s sugar, sifted
  • 1/2 cup (1 stick) unsalted butter, at room temperature
  • 3-4 tablespoons Baileys Irish Cream
  • 1/4 teaspoon pure vanilla extract

*Double the recipe if using pastry bag to ice the cupcakes

Sift confectioner’s sugar. Using an electric mixer, cream butter until it becomes pale in color. Add confectioner’s sugar, one tablespoon at a time. Once almost all sugar has been added, incorporate Bailey’s Irish Cream little by little until the buttercream reaches the icing consistency. You can always add more sugar and Baileys Irish Cream to taste.


Add to FacebookAdd to DiggAdd to Del.icio.usAdd to StumbleuponAdd to RedditAdd to BlinklistAdd to TwitterAdd to TechnoratiAdd to Yahoo BuzzAdd to Newsvine

Yummy Zucchini Cupcakes

28 Jul

After years of a sedentary life, I decided to get back to the gym and enroll in Pilates classes. I was seriously running the risk of becoming a fossil at home and something had to be done about it.

Of course, I woke up today extremely sore and with an excruciating abdominal pain that made it very hard to even get out of bed. I guess they weren’t kidding when they named yesterday’s class “Vin Diesel Abs”.

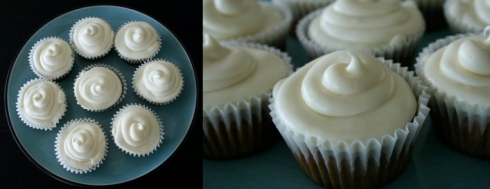
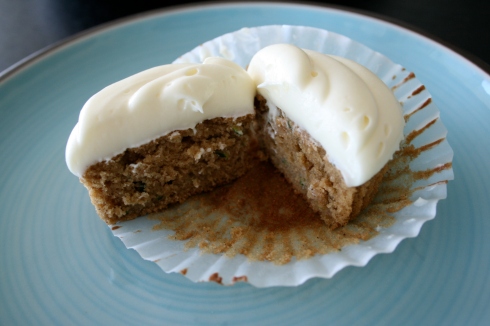
I was invited to lunch today over at some friends’ house and of course I couldn’t show up there empty handed, so I decided to get to baking and make zucchini cupcakes with cream cheese frosting; a recipe that I had been thinking up in my head (and researching) for a couple of weeks now.

These were a total success and a perfect dessert after an authentic Mexican meal consisting of cochinita pibil, pickled red onions and jalapeños, fresh tortillas, refried beans and rice. Yum! This is another reason why I started working out, so that I can eat all the delicious things I like and still fit into my clothes.

Zucchini cupcakes

Zucchini Cupcakes
Makes 12 regular size cupcakes

8 tablespoons unsalted butter, room temperature
1 cup dark brown sugar
1 ½ cups King Arthur White Whole Wheat Flour
1 ½ teaspoons baking powder
½ teaspoon table salt
½ cup sour cream
1 zucchini, grated
2 large eggs, room temperature
1 large egg yolk, room temperature
1 teaspoon milk
1 teaspoon pure vanilla extract
½ teaspoon cinnamon
¼ teaspoon nutmeg
½ teaspoon dark rum

* You can also add ¼ cup golden raisins and/or nuts to this recipe if desired.
* If using all-purpose  flour instead of white whole wheat flour, omit the milk in this recipe.

Preheat oven to 350° F. Line a standard 12-cupcake baking pan with cupcake liners.

In a medium bowl, sift the flour and whisk in baking powder, salt, cinnamon and nutmeg.

In a separate bowl, cream butter and sugar with an electric mixer, beating until light and fluffy (about 3 to 4 minutes). Add the sour cream and continue to beat until well incorporated. Add the eggs and egg yolk, one at a time, beating until thoroughly mixed into the batter. Add the vanilla and dark rum and beat until incorporated. Make sure you scrape the edges of the bowl with a rubber spatula so that all ingredients are mixed together.

Slowly add the dry ingredients, in increments, and mix well. Add the grated zucchini (and golden raisins/nuts if desired), milk and mix with a rubber spatula until well incorporated.

Scoop the batter into the cupcake liners (using a large ice cream scoop helps in evenly distributing the batter) and bake for about 18-20 minutes or until a toothpick inserted in the middle of the cupcakes comes out clean. Remove the cupcakes from the oven and let cool for 5 minutes. Then, transfer cupcakes to a wire cooling rack and allow to cool for a few more minutes before adding frosting.

In the meantime, prepare the cream cheese frosting.

Cream Cheese Frosting
Enough for 12 cupcakes when using pastry bag

8 tablespoons unsalted butter, room temperature
8 ounces cream cheese, room temperature
3 cups confectioners’ sugar
½ teaspoon pure vanilla extract
¼ teaspoon cream of tartar

With an electric mixer, beat butter and cream cheese in a medium bowl until smooth.  Add confectioner’s sugar, vanilla extract and cream of tartar and beat until fluffy. If you want a sweeter frosting, add more confectioner’s sugar to taste.


Zucchini cupcakes

Add to FacebookAdd to DiggAdd to Del.icio.usAdd to StumbleuponAdd to RedditAdd to BlinklistAdd to TwitterAdd to TechnoratiAdd to Yahoo BuzzAdd to Newsvine

Like This!